Install Kinect on Ubuntu 12.10
2013年4月09日 16:48
This is a simple and short tutorial on how to set up Kinect for your Linux Mint 12 (It also should work fine with Ubuntu 12.04 or 12.10). For this task OpenNI Framework is going to be used. The official short description of OpenNI is :
The OpenNI Framework provides the interface for physical devices and for middleware components. The API enables modules to be registered in the OpenNI framework and used to produce sensory data. Selecting the hardware or middleware module is easy and flexible.
This Tutorial will use the NITE middleware to enable skeleton tracking.
To install KInect with OpenNI and NITE please follow the next 5 steps, with your Kinect Unplugged.
Step 1 - Install Required support library
First step is to check if you have all the needed libraries, and if they are up to date.
sudo apt-get install libusb-1.0-0-dev freeglut3-dev g++
If you have a Nvidia graphics card it's recommended to have the latest drivers: Instruction here
Step 2 - Create a folder for holding the download and the installation
I recommend to create a 'kinect' in your home folder:
cd ~
mkdir kinect
Step 3 - Download the OpenNI , NITE
It's going to be necessary to download to the created folder the latest OpenNI Binary and the NITE middleware. Until the publication of this tutorial the most recent version available were :
Update 06-JUN-2012*
If you are using Ubuntu 12.04 make sure to have the following versions (I tried Openni version 2.1.0, not working, but 1.5.4 works!):
- OpenNI UNstable build for Ubuntu 12.04- - v1.5.4 https://github.com/OpenNI/OpenNI/tree/unstable
- PrimeSense and NITE UNstable build for Ubuntu 12.04 - v1.5.2.21 https://github.com/PrimeSense/Sensor/tree/unstable
Step 4 - Extract the downloaded zip to the desired folder
Now Extract The files and Rename the folders:
Your 'kinect' folder should have 3 zipped files.
cd ~/Kinect/OpenNI-unstable/Platform/Linux/CreateRedist$ ls

sudo ./RedistMaker

cd ../Redist

sudo ./install.sh
cd ~/Kinect/SensorKinect/Platform/Linux/CreateRedist

sudo ./RedistMaker

cd ../Redist/

sudo ./install.sh
cd ~/kinect/NiTE-2.0.0/

sudo ./install.sh
Step 5 - Test it!
cd ~/Kinect/OpenNI-unstable/Platform/Linux/Redist/OpenNI-Bin-Dev-Linux-x86-v1.5.4.0/Samples/Bin/x86-Release

./Sample-NiSimpleViewer
Bug Fix:
" Failed to set USB interface "
this module allows Kinect to be used as a standard camera, so you can record video from it with the applications you're used to. Thus, it conflicts with OpenNI when trying to access the Kinect.
And then blacklisting to avoid it to be auto-loaded on boot:
 sudo modprobe -r gspca_kinect

 sudo sh -c 'echo "blacklist gspca_kinect" > /etc/modprobe.d/blacklist-kinect.conf'
Reference:
http://igorbarbosa.com/articles/how-to-install-kin-in-linux-mint-12-ubuntu/
https://groups.google.com/forum/?fromgroups=#!topic/openni-dev/LZpcyCfh9UE
http://adriangerardcooke.com/kinect-on-ubuntu-12-04/
http://www.20papercups.net/programming/kinect-on-ubuntu-with-openni/
Enable "locate" command in Mac OS
2013年3月27日 11:32
sudo launchctl load -w /System/Library/LaunchDaemons/com.apple.locate.plist

sudo /usr/libexec/locate.updatedb
Install OpenCV 2.4.3 Mac OS X (Mountain Lion)
2013年3月27日 11:29
http://www.pansenti.com/wordpress/?page_id=701
Overview
Syntro has been tested on Mac OS X 10.7.3, but will probably work fine with other versions as long as the dependencies are met.
Syntro relies on Xcode, Qt, pkg-config and optionally OpenCV for some of the demo apps.
Xcode provides the compiler suite and Git for source control.
We are using pkg-config and OpenCV from the MacPorts project.
Install Xcode
Syntro has been tested with the Xcode 4.2.x tools, but the example will use the latest.
Download Xcode 4.3.2 for Lion from the Apple App store.
The file will be called xcode_432_lion.dmg.
Install it by dragging it to the Applications folder.
Install Xcode Command Line Tools
Start Xcode and select the Xcode | Preferences… menu.
In the dialog that appears, go to the Downloads tab and install the Command Line Tools
Verify the compiler and git are installed and work from the command line
$ g++ --version
i686-apple-darwin11-llvm-g++-4.2 (GCC) 4.2.1 (Based on Apple Inc. build 5658) (LLVM build 2336.9.00)
Copyright (C) 2007 Free Software Foundation, Inc.
This is free software; see the source for copying conditions. There is NO
warranty; not even for MERCHANTABILITY or FITNESS FOR A PARTICULAR PURPOSE.

$ git --version
git version 1.7.7.5 (Apple Git-26)
Install MacPorts
Follow the instructions from the MacPorts guide.
We use the Mac OS X Package Install method.
Install OpenCV and pkg-config from MacPorts
Update MacPorts and install OpenCV
$ sudo port selfupdate
$ sudo port install opencv pkgconfig
OpenCV will be installed in /opt/local directories.
You can check that both pkg-config and opencv are setup correctly this way
$ pkg-config opencv --cflags
-I/opt/local/include/opencv -I/opt/local/include

$ pkg-config opencv --libs
-L/opt/local/lib -lopencv_core -lopencv_imgproc -lopencv_highgui -lopencv_ml -lopencv_video -lopencv_features2d -lopencv_calib3d -lopencv_objdetect -lopencv_contrib -lopencv_legacy -lopencv_flann
You may have to add /opt/local/bin to your PATH to find MacPorts binaries.
Install Qt Binaries
Syntro requires Qt 4.7 or greater.
Download >qt-mac-opensource-4.8.1.dmg from http://qt.nokia.com/downloads/qt-for-open-source-cpp-development-on-mac-os-x
Install Qt by first opening the dmg file with >DiskImageMounter or by double-clicking if you have that enabled. When the new folder opens with the contents of the dmg, there will be aQt.mkpkg file. Open this with Installer or again by double-clicking. This will launch the Qt install program.
Accept the defaults and Qt will be installed under /Library/Frameworks
Configuring QMake mkspecs
The Syntro .pro files require the macx-g++ build specs rather then the default macx-xcodespecs.
If you understand what this means and require macx-xcode for other Qt projects, then you probably know how to customize the behavior, either by using a -spec argument to qmake or with the QMAKESPEC environment variable.
The following instructions will change the default for all Qt qmake usage.
$ cd /usr/local/Qt4.8/mkspecs
/usr/local/Qt4.8/mkspecs$ ls -l default
lrwxr-xr-x 1 504 wheel 10 Apr 10 10:04 default -> macx-xcode

/usr/local/Qt4.8/mkspecs$ sudo rm default
/usr/local/Qt4.8/mkspecs$ sudo ln -s macx-g++ default

/usr/local/Qt4.8/mkspecs$ cd ~
$ qmake --version
QMake version 2.01a
Using Qt version 4.8.1 in /Library/Frameworks
QtCreator IDE (optional)
Qt provides a cross-platform IDE for application development.
All of the Syntro applications can be built from a Terminal shell or a remote SSH shell so installing Qt Creator is optional.
If you plan on developing custom Syntro applications on the Mac, then you probably want to install Qt Creator.
Download >http://qt.nokia.com/downloads/qt-creator-binary-for-mac.
Install QtCreator by double-clicking the dmg file. A new folder will open with two items, a Qt Creator icon and an Applications icon. Drag the Qt Creator icon over to the Applications icon. This will launch the installer. Follow the instructions for a default install. Qt Creator will now be available in vertical-align: baseline; Launchpad.
Finished
Your Mac system is now ready for Building Syntro on Mac OS X.
Mac OS X 下安装 Emacs 24及配置preclude
2013年3月26日 06:55
http://batsov.com/articles/2011/10/09/getting-started-with-emacs-24/
我用brew安装的emacs版本有问题,后来到http://emacsformacosx.com/下载纯净版本的emacs
然后再按如下文章配置preclude
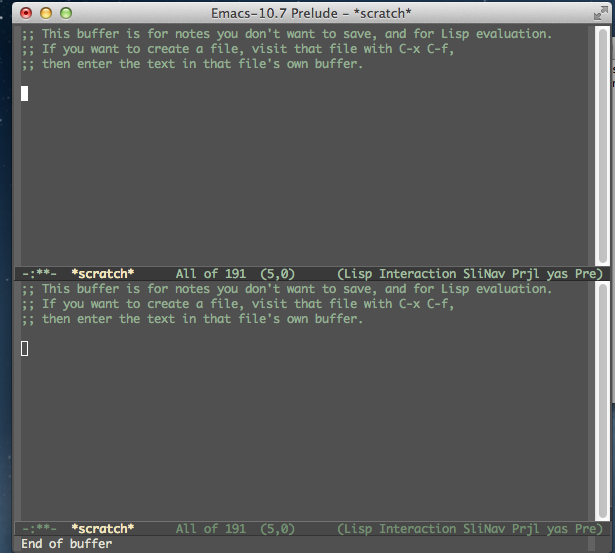
经过emacs自动编译后如图
Last month I’ve blogged about the exciting things are coming up in Emacs 24. What I failed to mention originally is that altough Emacs 24 is slated for a Spring 2012 (tentatively) release there is no real reason not to start using it now. You should also keep in mind that it’s feature complete since it officially entered the feature freeze of its development cycle in July 2011.
I’ve been using Emacs 24 for several months now and it has been nothing but rock solid. I guess the only real obstacle currently is that the way to obtain Emacs 24 is not particularly straightfoward/clear, hence this post.
I’ll discuss here the installation and initial configuration of Emacs 24 on OSX, GNU/Linux and Windows.
Installing Emacs 24
OS X
Obtaining Emacs 24 on OS X is really simple. There are two popular ways to do it. The first is to simply download a pretest (or a nightly build) from Emacs for OSX. My personal recommendation would be to get the latest pretest (which is ironically the first pretest as well) from here.
That was really easy, right?
The second easy way to obtain Emacs 24 is via homebrew. Just type the following incantation in your shell and you’re done:
$ brew install emacs --cocoa --use-git-head --HEAD
$ cp -r /usr/local/Cellar/emacs/HEAD/Emacs.app /Applications/
The second step is optional, but it’s recommended if you like to start Emacs from the launchpad or from Spotlight. Personally I prefer to start Emacs in daemon mode (emacs --daemon), so that I could share a single Emacs instance between several Emacs clients.
That’s all folk! You may now proceed to the configuration section.
Linux
Given that Linux is more or less the home os of Emacs it presents us with the most installation options. Of course, we can build Emacs from source on every distribution out there, but I rarely bother to do so. Using the distribution’s package manager is a better idea for many reasons - you don’t need to install a build chain and lots of dev libraries, you get updated versions when they are released and you get automated dependency manager, just to name a few.
That said, few distributions include in their primary repositories builds of Emacs 24. Luckily there are some unofficial repos that come to the rescue.
Debian/Ubuntu users should look no further than the amazing emacs-snapshot APT repo. You’ll find installation instructions there for all the relevant Debian and Ubuntu versions out there. High quality, highly recommended builds!
Gentoo users have even less to do, since Emacs 24 can be obtained via the emacs-vcs package in portage, as noted in the official Emacs on Gentoo page.
Windows
There are several ways to obtain precompiled Emacs 24 binaries if you’re a Windows users. The most popular are EmacsW32,Emacs for Windows and of course the official Emacs Windows builds. I’ve ,personally, never used any builds other than the official ones. The unofficial builds usually include installers and various patches that might be of use to some users.
Since I rarely use Windows I cannot give you any more advice on the choice of a binary vendor.
Initial configuration
Installing Emacs has always been the easy part, configuring it properly - not that much. That’s why I’ve created the Emacs Prelude - an advanced Emacs setup specifically for Emacs 24 that has been tested to properly work on OSX, Linux and Windows.
Its installation is dead simple:
$ git clone git://github.com/bbatsov/prelude.git path/to/local/repo
$ ln -s path/to/local/repo ~/.emacs.d
For Windows Vista/7 the ~(home) folder is
C:\Users\<USER>\AppData\Roaming\
The configuration in the Prelude is commented extensively and will be improved more along the way. Reading it will be an enlightening experience for all new Emacs users.
The Prelude itself is a moving target. I’ve created it recently and I plan to add a lot more cool things very soon, so stay tuned. If you have any problems with it or have feature suggestions - do not hesitate to open tickets and send pull requests.
Epilogue
Now that I’ve shown you how easy it is to get a hold of Emacs 24 and I’ve provided you with a starting configuration there is really no excuse not to switch to Emacs 24. Install it, use it, love it!